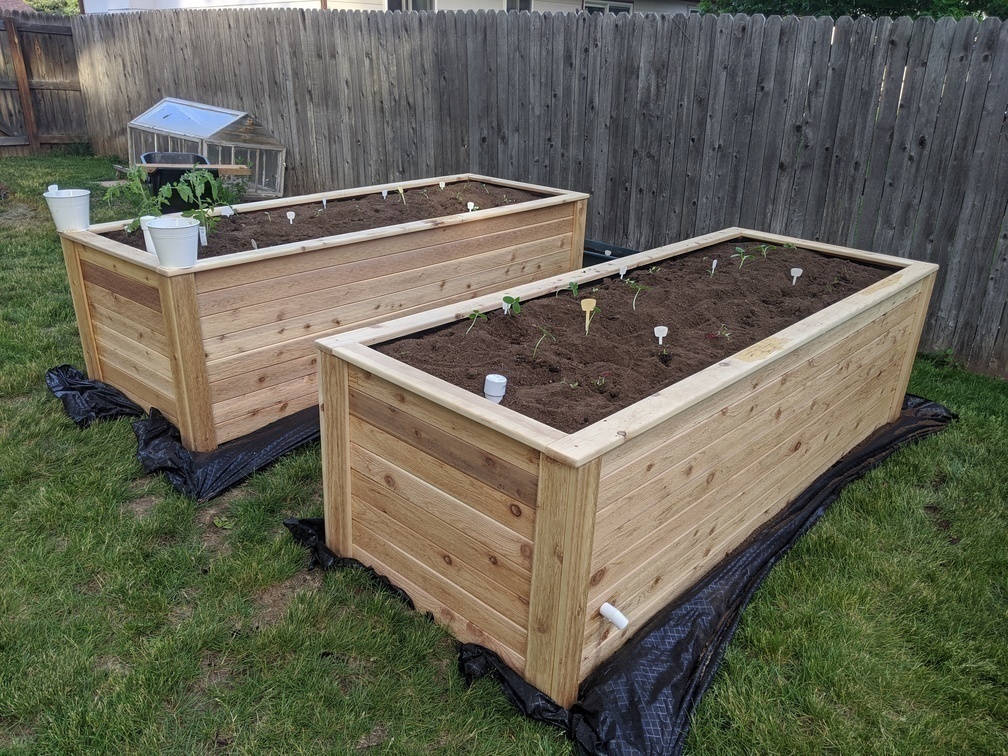
Over the last few weeks, I built April Wilkerson’s Raised Garden Beds with self-watering system. They are really good looking, and were fun builds, but I do have some notes on the build that may help others.
I bought the plans, which is highly recommended. These notes are, in many cases, just addendum to the plans.
Bill of Materials
The plans were a little confusing on the boards that were needed. I used:
Cedar:
- 1x4 8ft: Qty 28
- 1x4 98-1/2" (or more, I got 10ft): Qty 2 (for the top rails, Cutting diagram shows <96", but cut list shows 98-1/2").
- 1x6 1ft: Qty 1
- 2x4 8ft: Qty 2
Sheet goods:
- 4x8 3/4" Plywood: Qty 2 (I used a CD plywood and sanded the hell out of it on the drawers, might do an AC if I did it again). Not pressure treated.
Other:
- 16oz Titebond III (exterior grade)
- 1-lb or 200ct 1-1/2" construction or deck screws.
- 2" brad nails.
- 3 pair 19" drawer slides if you do drawers.
- HDPE (Food Grade) pond liner, 5ft x 11ft or larger.
- Around 1 yard or more of soil.
Irrigation:
- 50ft landscaping drain, perforated, with sock.
- 1-1/2" 24" PVC with a cap for the fill tube.
- 3/4" 24" PVC, 90 degree and a 45 degree for the overflow.
Total cost was around $300 for lumber, $100 for soil, 100 for the self-watering.
Location
Because of the self watering you will want it more or less level. Also, April Wilkerson seemed to put them on pavers, which raised them up a bit. I put down landscaping fabric, leveled them, and just cut the facing off the bottom part of the drawers to give me some room, but I still need to put some stone or mulch or something down.
Decide if you want to put it on pavers.
Cutting List and Diagram
There is a discrepancy on the “long top trim” between the Cut List (98-1/2") and the Cut Diagram (cut from 96"). See Step 6 notes below.
Decide if you want to make the top long supports but into the short supports. This will allow all the 1x4s to be 8ft, but you will have to make the short side supports longer. I had already cut the short supports, so I had to get some 10ft 1x4s for the long trim. But this also supports the long trim better.
Also note that the purple shorter pieces in the diagram represent multiple different sizes in the “Sides, insert supports”.
Deep Variant
I made one without drawers under it, to get additional depth.
Step 1
I put glue on each post, then I used a single brad nail in each end of the boards to hold them to the posts. Then I squared it and put 2 screws in each end.
Step 2
Similar process here. I did leave one end of the first board on the ground and brad nailed the other end to the side. Then went to the other side and brad nailed. At that point, no support was necessary. Square and screw.
Step 3
Per instructions.
Step 4
Per instructions.
Step 5
The instructions say to install the cleats, then drop in the plywood deck. Put the deck in before the cleats, or you will need to notch out the deck for the cleats, and also the cleats will be too short.
I also put 4" screws, one in each corner of the frame into the corner posts. I also toe-nailed the frame long sides into the side boards to hold them while the glue dried.
Step 6
NOTE: this steps shows the long top trim butting up to the short side trim. However, the cut list cuts the short side trim to butt up to the long trim. But, this requires longer than 8ft 1x4. The cut list specifies top trim at 98-1/2", but the cutting diagram shows the top trim being cut from a 96" piece.
I used a 14mil HDPE pond liner. HDPE is apparently food-safe.
Unlike in the video, I only stapled the top edge of the pond liner, so I didn’t need to duct-tape over the staples in the bottom of the liner.
I used pocket holes and glue to join the short and long top trim, before screwing it to the top. I did not add additional support under the top trim as April did in the video.
Step 7
Per instructions.
Step 8
Per instructions.
NOTE: You should fit the drawers in place before you do the final placement, leveling, and filling with dirt. My drawer supports shifted, and I had to hammer them back into place, using a protective 2x4, which worked well enough.