We have a bunch of machines behind haproxy load balancers. The haproxy is publicly accessible and can use the ACME HTTP method for certificate renewal. The machines behind it are using self-signed certs from our own CA, but there are cases where we might like to have certs on both systems that are “legit”. For example, a gitlab instance that is accessible internally and externally, or our web servers for internal or testing access.
For the internal machines, I came up with the idea of using DNS to verify the registration, while the haproxy continues to do HTTP.
I wanted to restrict the AWS access keys so the compromise of one machine didn’t expose our entire DNS, so I created a recipe that allows for the access key to be limited to a specific name.
Overview
AWS does not allow limiting access based on the DNS record name. There has been a request open since 2014 to implement it, but it doesn’t seem to have any traction. So we are going to create the record for the certificate as it’s own “hosted zone”, and then limit the access key to that.
In this example I’m going to set up a certificate for “sean.example.com”.
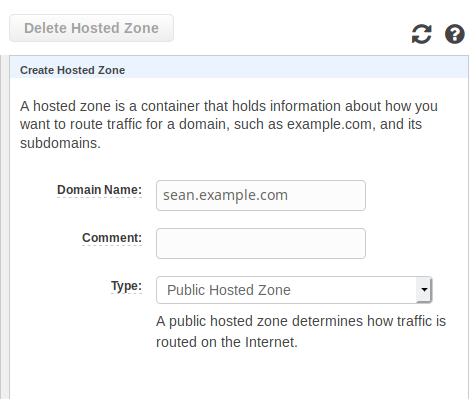
Create Hosted Domain
In the AWS console:
- Services -> Route53
- “Hosted zones”
- “Create Hosted Zone”
- Domain Name: “sean.example.com”
- Click: “Create”
- Create an A record at the root of the zone with the IP for this server. NOTE: This cannot be a CNAME.
- Make a note of the listed name-servers.

Link the Sub-zone to the Parent
- Click on the parent zone (“example.com”)
- Remove the record you previously had (if any) for this name (“sean.example.com”)
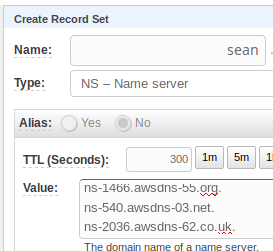
- “Create Record Set”
- Enter the sub-domain name for “Name” (“sean” in my example)
- Type: NS
- Paste the name-servers from above.
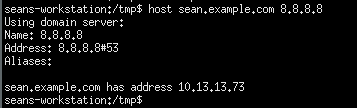
- Test DNS by issuing “host sean.example.com 8.8.8.8”, it should reply with your A record.
Make a note of the Zone ID
- Click “Back to Hosted Zones”.
- Make a note of the “Hosted Zone ID” for “sean.example.com” (it’ll be something like “Z32Q1Y2H6MH3DR”).
Creating the Policy
You can use the visual policy editor, but it’s easier to just paste in this JSON, and substitute your zone ID towards the bottom.
- Services -> IAM
- Click: “Policies”
- Click: “Create Policy”
- Click “JSON” tab.
- Paste the following, putting your Hosted Zone ID (recorded above) in place of “MY-ZONE-ID”:
    {
        "Version": "2012-10-17",
        "Statement": [
            {
                "Effect": "Allow",
                "Action": "route53:ListHostedZones",
                "Resource": "*"
            },
            {
                "Effect": "Allow",
                "Action": [
                    "route53:GetHostedZone",
                    "route53:ChangeResourceRecordSets",
                    "route53:ListResourceRecordSets"
                ],
                "Resource": "arn:aws:route53:::hostedzone/MY-ZONE-ID"
            }
        ]
    }
- Click: “Review Policy”
- For the name, I used “modify-sean.example.com”.
- Click “Create Policy”.
Create IAM User
- Services -> IAM
- “Users”
- “Add User”
- I used a descriptive username: “letsencrypt-sean.example.com”
- Check: Programmatic Access
- “Next: Permissions”
- Click: “Attach existing policies directly”
- Search for your policy name above and select the checkbox.
- Click: “Next: Tags”
- Click: “Next: Review”
- Click: “Create User”
- Make a note of the Access and Secret keys. If you don’t save them here, you will have to create a new credential, it won’t show it again.
Attach the Policy to the User
- Services -> IAM
- Click on “Policies” on the left.
- Search for you policy name and click it.
- Click the “Policy Usage” tab.
- If it does not list your user here, add it.
Creating the Certificate
I used “acme.sh” to create my certificate. It includes support for Route53, where Certbot when I last used it (hopefully fixed now) included an old AWS library that would not work.
So I just cloned the acme.sh repository, and then ran:
export AWS_ACCESS_KEY_ID=<saved from above>
export AWS_SECRET_ACCESS_KEY=<saved from above>
acme.sh --issue --dns dns_me -d sean.example.com -d sean.example.com
After a minute or less, it should tell you where it wrote your certificate.